Hi!
Third part of my first steps in Unity.
I guess you’re here because you want to know what I did to make my car brake? I’m about to show you my first code after hours (like, a lot of hours) of struggle to figure out how I can do thing and why the holy hell so many things I tried just didn’t work (although in those cases, I’m still not sure why).
Please remember I’m beginning, and that code is certainly not what you’d get from a pro.
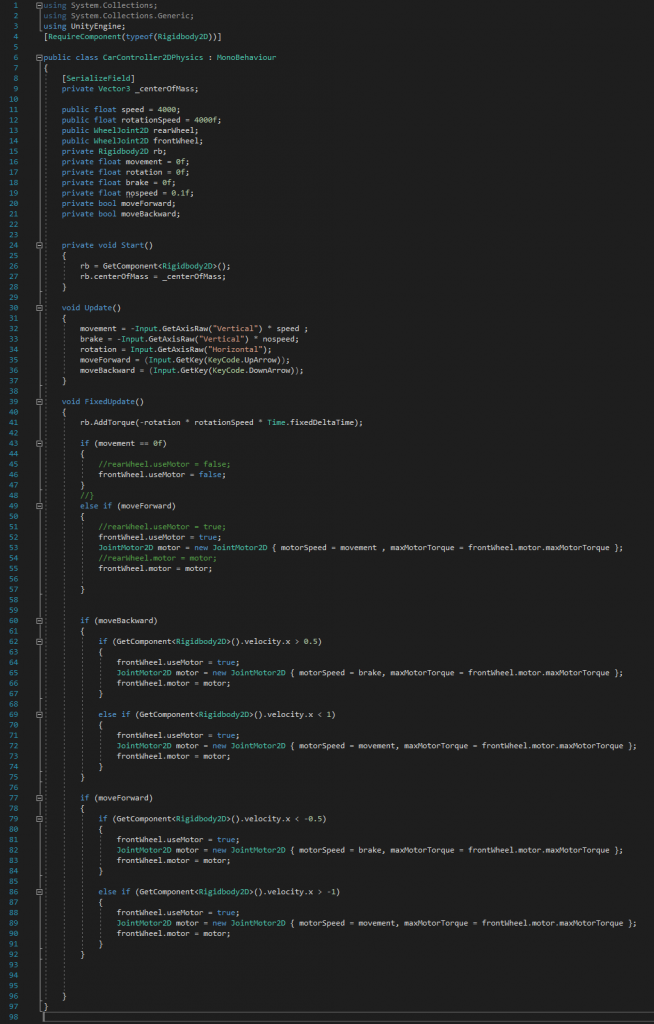
First of all, here is the complete code (so far), click the picture to get it full:
Now I’m going to describe each part the best way I can (hum…), the way I understood all of that.

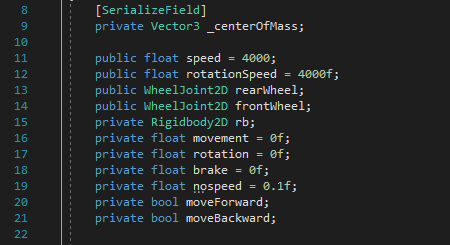
These are the functions (functions? – I don’t know yet how they are called) that are going to be used.
[SerializeField] private Vector3 _centerOfMass: used to show and modify the center of mass (although I haven’t tried it yet in 2D mode, but it works in 3D physics) in the Inspector.
(public float means that we can change the value in the Inspector.)
public float speed: used for the speed of the motor.
public float rotationSpeed: used for the rotation of the car when in the air.
public WheelJoint2D: used in the Inspector to assign the wheels’ Wheel Joint 2D components.
private Rigidbody2D rb: used as “rigid body”, to control the center of mass and rotation of the car.
private float movement: used to assign the up and down-arrow keys, and trigger the movement of the car.
private float rotation: used to assign the right and left-arrow keys, and trigger the rotation of the car in the air.
private float brake: used to assign the up and down-arrow keys, and trigger the brakes.
private float nospeed: used with brakes, to set the motor speed to 0.
private bool moveForward: used to check whether the up-arrow key is pressed.
private bool moveBackward: used to check whether the down-arrow is pressed.

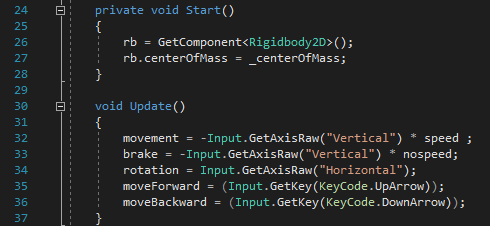
private void Start
rb = GetComponent<Rigidbody2D>(): assigned the component Ridigbody2D (which is the car) to “rb”.
rb.centerOfMass = _centerOfMass: now that rb is understood as the car, we get its center of mass.
void Update()
movement = -Input.GetAxisRaw(“Vertical”) * speed: the value of movement will be the one of speed (that I set to 4000) multiplied by 1 or -1, depending on which arrow key is pressed (up or down, considered as the vertical axis input).
brake = -Input.GetAxisRaw(“Vertical”) * nospeed: same as movement, but nospeed is set to 0.1.
rotation = Input.GetAxisRaw(“Horizontal”): used to rotate the car when pressing the left/right arrow keys (hence the “horizontal”).
moveForward = (Input.GetKey(KeyCode.UpArrow)): set the value of moveForward to the up arrow key.
moveBackward = (Input.GetKey(KeyCode.DownArrow)): set the value of moveBackward to the down arrow key.
Okaaaay, we’re all set, now time to affect the car’s behavior!
First, when to activate the motor to make the car move.
rb.AddTorque(-rotation * rotationSpeed * Time.fixedDeltaTime);: the “formula” to make the car rotate when pressing right/left arrow keys.
if (movement == 0f) {frontWheel.useMotor = false;}: It means that when we’re NOT pressing the up/down arrow keys, the motor is off.
After that, it comes to what happens when the up and down arrow keys are pressed. In each, there are 2 possibilities, depending on the speed on the car (velocity).
The problem here is that it’s for sure the wrong way to do it, it’s only a workaround as I have no idea what to use to do it properly.
Ideally, the conditions should be set on the rotation speed of the front wheels, but so far I haven’t found anything. Whereas in my case, it’s the speed of the whole car as an object. Moreover, it’s very approximate, as you can see, because I set values to the velocity (-1, -0.5, 0.5, 1) that I chose randomly, but it works! As a beginner, I can’t complain, but I’m aware I’ve done it wrong.
So depending on the velocity, the motorSpeed changes either to normal (=driving), or to 0 (=braking). Again, it is faaaaar from being good: the motor’s speed is either at its maximum, or at 0, there is no smooth acceleration nor deceleration. Got to fix that too…

